Create Form Structure
1. Install and Active Gravity Forms
You will need Gravity Forms installed and activated for this tutorial.
Don’t have it? Buy it here.
2. Navigate to Forms > New Form
Start creating a form by navigating the the Gravity Forms area in your WordPress admin area, then click “New Form”

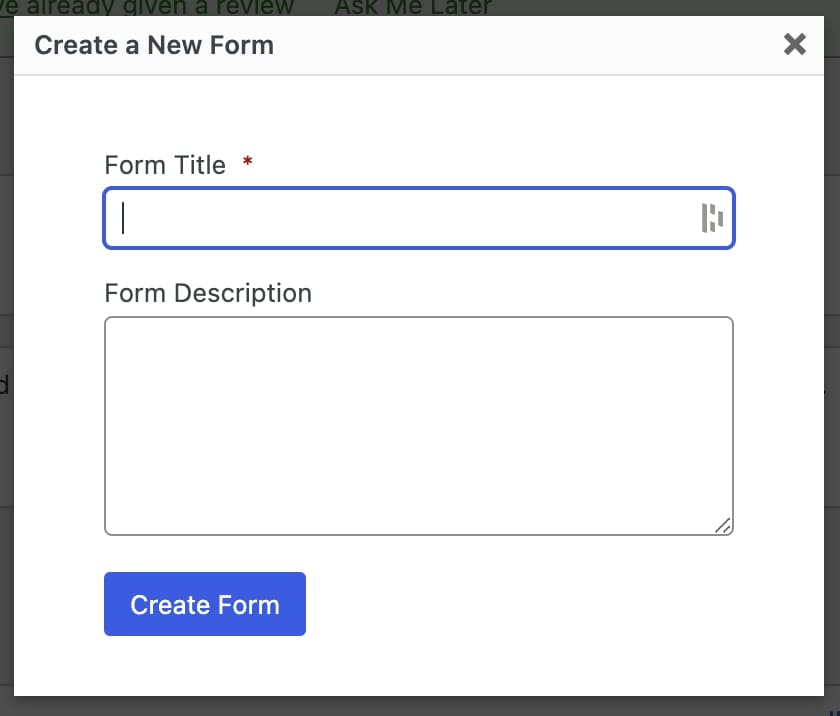
3. Title and Describe New Form
Give your form a new title and description (optional) then click “Create Form”
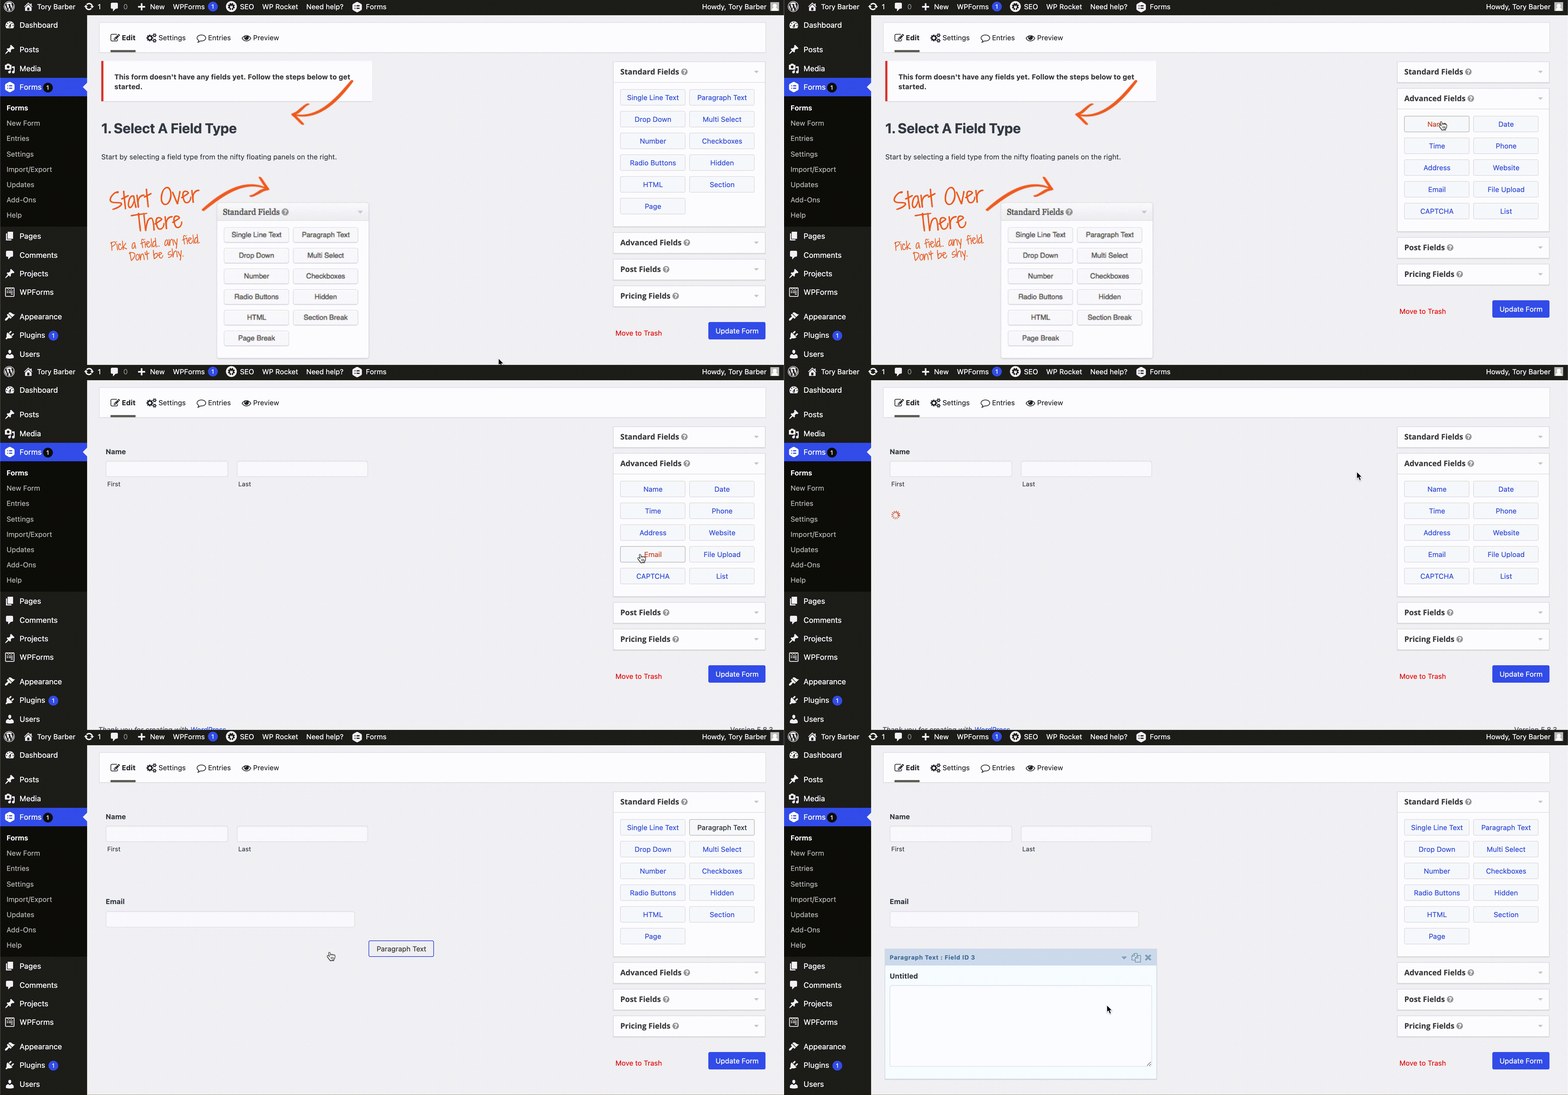
4. Drag and Drop Required Elements in Builder
Select elements from right hand dropdowns and drag them over to the building area on the left.
Continue this process until all required elements are listed in the order you’d like them to appear on your website.
5. Label and Set Required Elements
Select an element, then enter in a label, and select whether or not a user is required to fill out this field

6. Ensure Fields are the Same Width
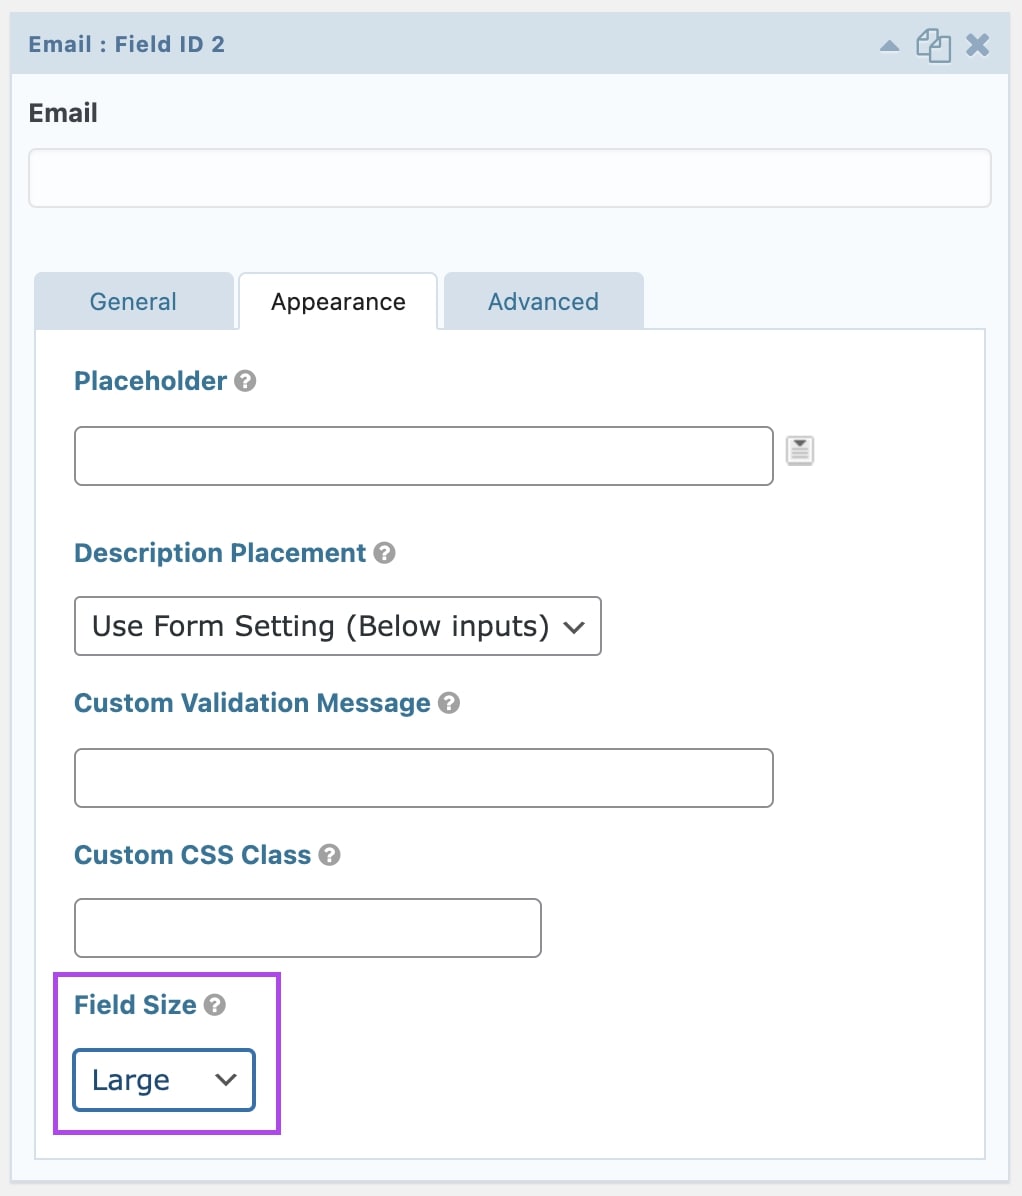
Phone and email fields have a smaller width than other elements by default. If you’re using either of these elements, click on the block, click on the “Appearance” tab, then set the “Field Size” to large.
7. Click Update Form
You now have the basic structure of your form created
Set Up Notification Settings
1. Navigate to your Form’s Notification Settings

2. Click Edit on Auto-Generated Notification Setting
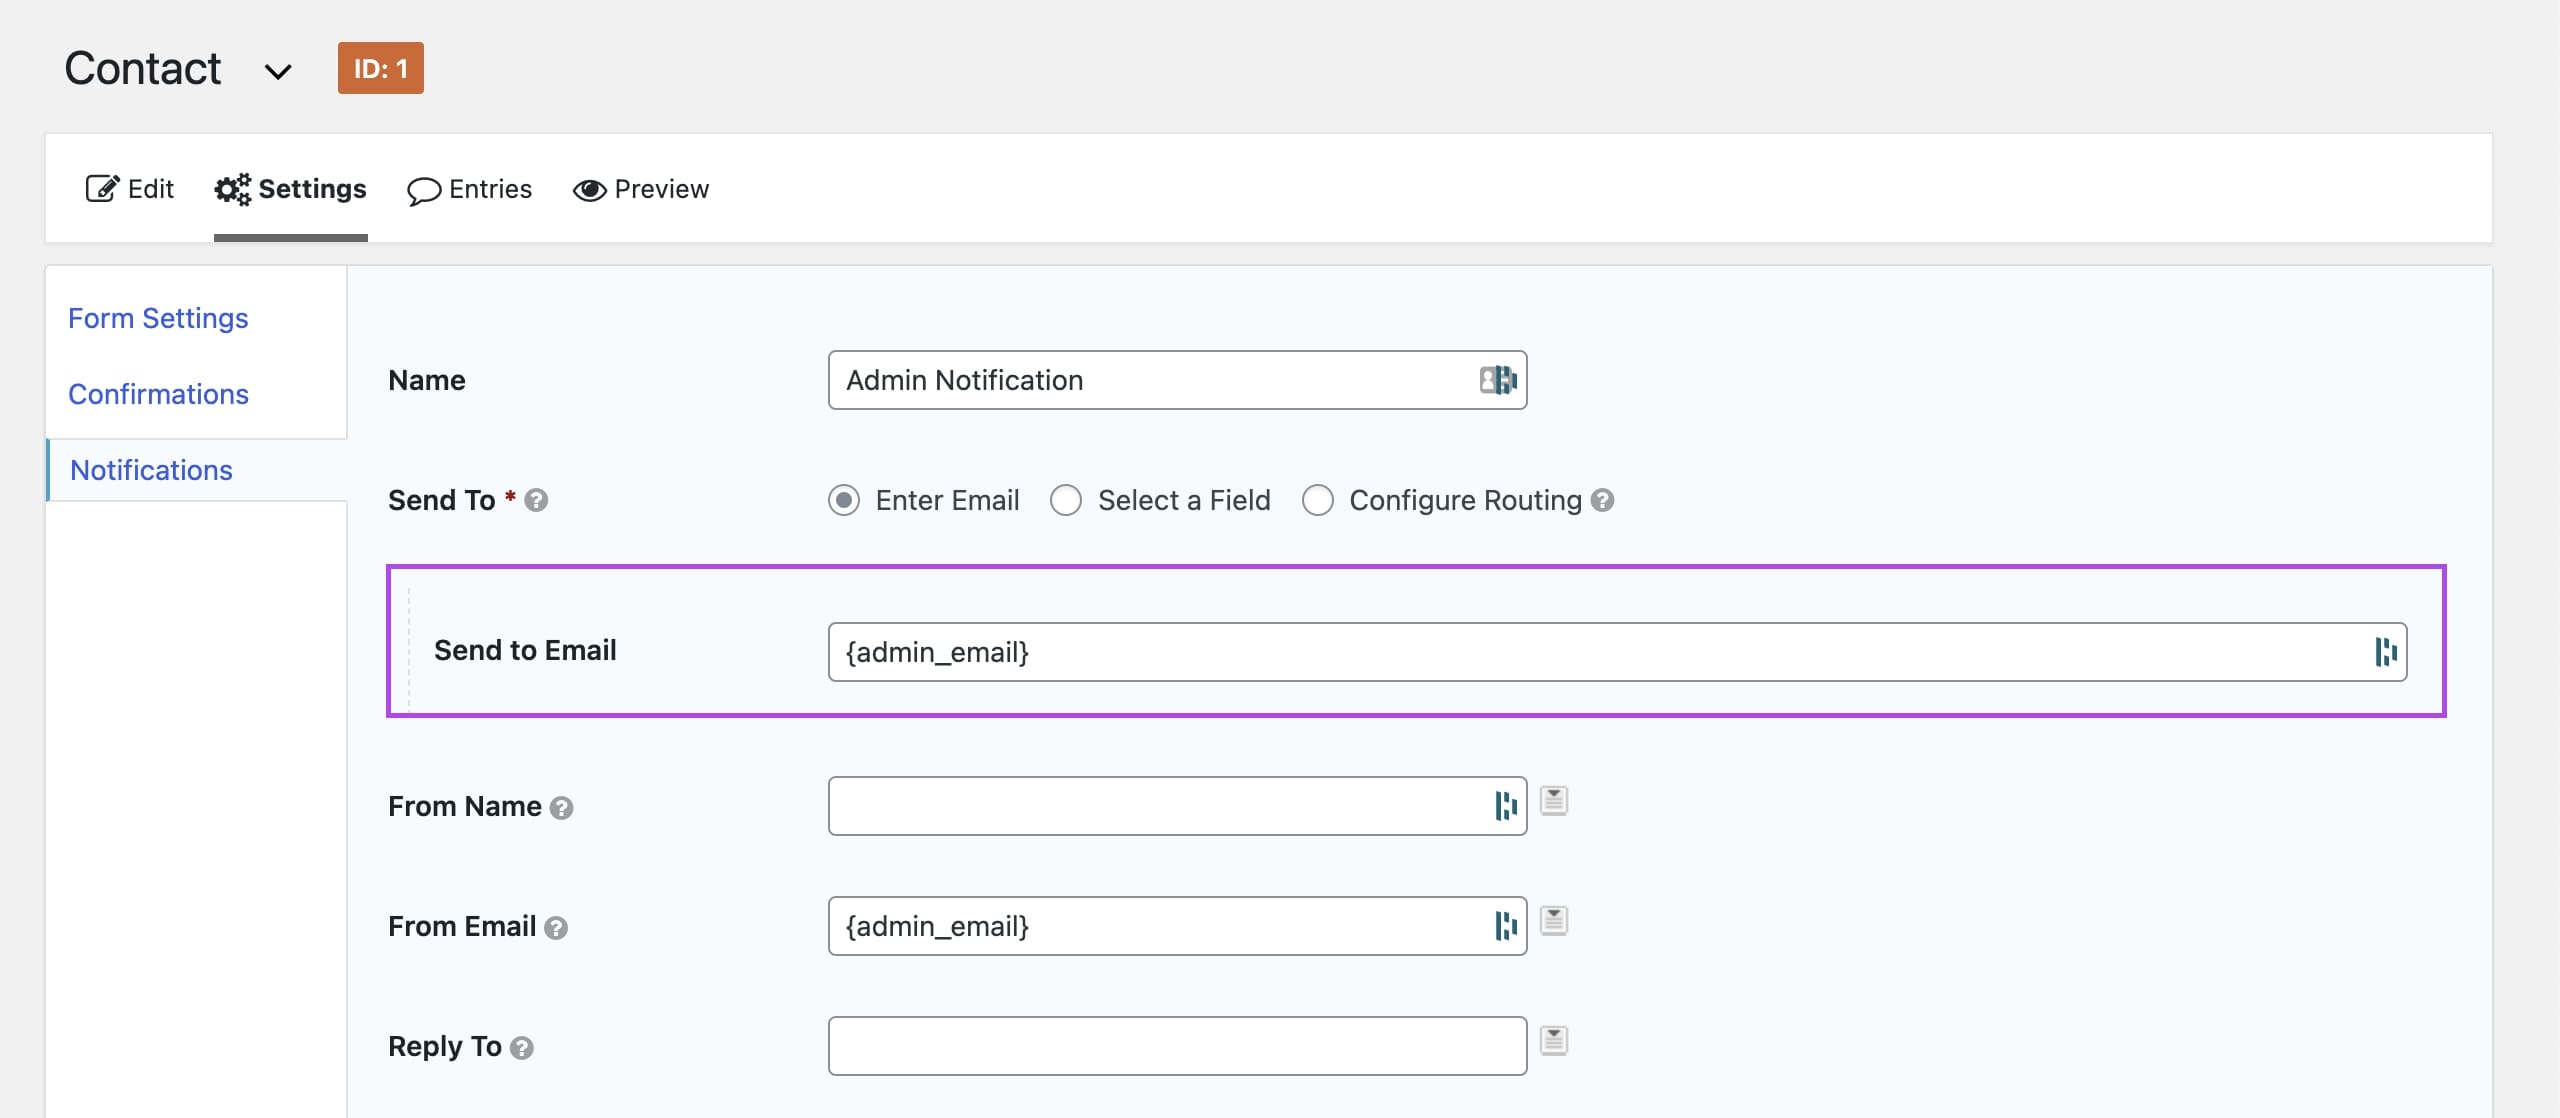
Gravity Forms automatically creates a notification setting for you using the WordPress admin email. We will be editing this notification.

3. Change “Send to Email”
Remove the “{admin_email}” text, and replace with the email you’d like the form information sent to
You can list multiple emails by separating each address with a comma
4. Set the Subject Line
Edit the subject line to something that reflects the purpose of the form and will be easily identifiable in your inbox.
5. Organize Your Message
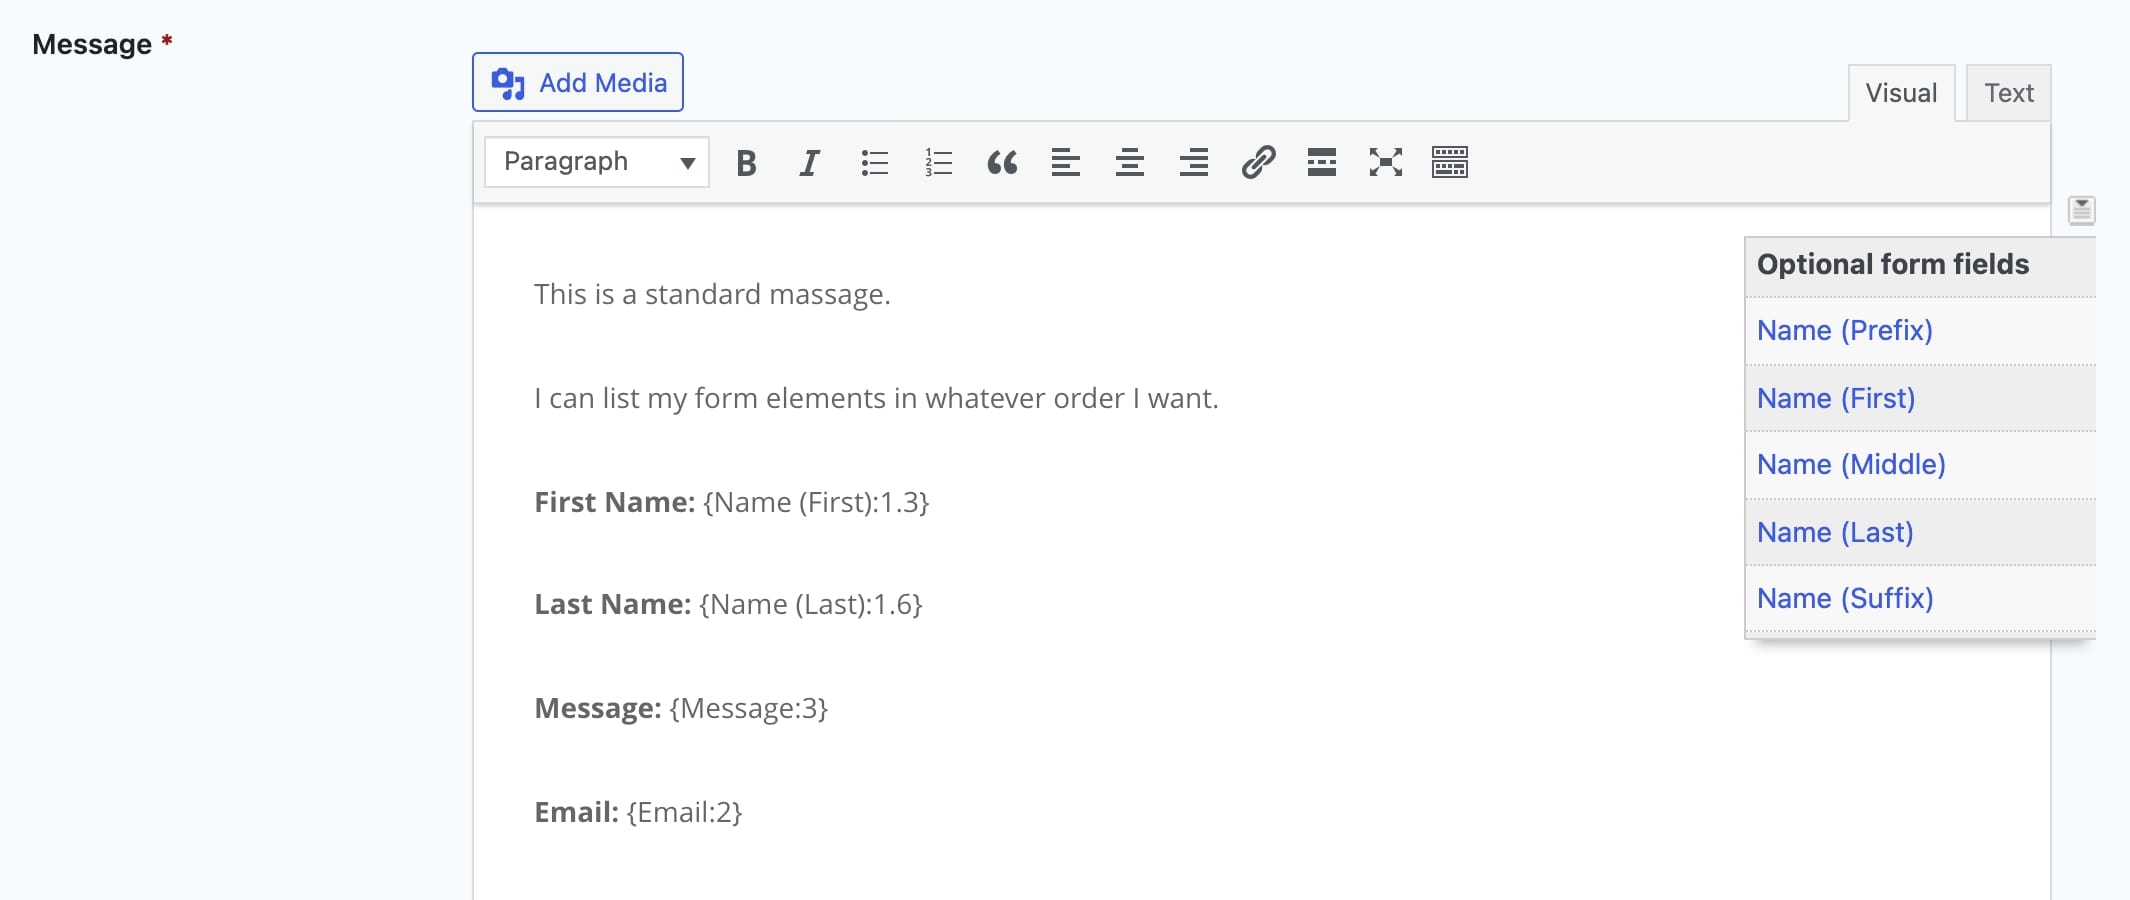
Gravity Forms automatically creates a message that will list all the elements you chose in your form, and all the information someone entered in those fields. This is likely all you need for your form, however you can get a little more fancy if you’d like.
Using the text editor, you can write a standardized message, and using Merge Tags (the small icon button to the left of the text editor) you can pull in individual field information in a customized list.
6. Press “Update Notification”
Add Form to Page
1. Locate your form’s ID number
Go to the Gravity Forms List Forms page, and locate your form’s ID

2. Add Gravity Forms Shortcode to your page
Navigate to the page you’d like to add the form to. Press edit and add a shortcode element
Add the following shortcode to your page, replacing the ID number with the one you discovered in step 1 of this section:
[ gravityform id=’1′ title=’false’ description=’false’ ]
*Get rid of spaces before brackets*
3. Save, View, and Test Your Form
Make sure your test you form to ensure it works like you intended.
Style Your Form
1. Add a CSS Class to Form
Navigate to your forms settings and add a unique class name in the “CSS Class Name” field. Then scroll down to the bottom of the page and press “Update Form Settings”.

2. Plan How You’d Like it to Look
Plan which elements you’d like to change so you can easily target them with CSS.
Design tip: At a minimum, fonts and button styles should follow what’s been used in the rest of the site.
3. Add CSS
Navigate to Appearance > Customize > Custom CSS to open a global CSS editor.
Using your browser’s dev tools, inspect the page, and find the CSS classes/IDs for the aspects of the form you’d like to style. Using these classes/IDs and the class you set in step one, target the fields you’d like to style, and add CSS in global CSS editor.
Design tip: This is the minimum styling I use on my forms (replace CSS values with your styles)
.contact-form label {
color: var(–font-color-dark);
font-family: var(–font);
font-weight: 500;
font-size: 18px;
}
.contact-form .gform_button {
background-color: var(–primary-color);
border-color: var(–primary-color);
color: var(–font-color-light);
padding: 15px 35px;
text-align: center;
border-radius: 100px;
border-width: 2px;
border-style: solid;
font-family: var(–font);
font-size: 18px;
font-weight: regular;
letter-spacing: 1px;
text-shadow: none;
}
.contact-form .gform_button:hover {
background-color: var(–secondary-color);
border-color: var(–secondary-color);
color:var(–font-color-dark);
letter-spacing: 2px;
}


