What is Firefly Generative Fill?
Generative Fill (previously called Inpainting) is the latest and greatest in Adobe Firefly’s suit of Generative AI Tools.
Not to be confused with the new AI Feature in Photoshop (confusingly also called Generative Fill), Firefly’s Generative Fill can be used online for free!!
How to Use Generative Fill in Photoshop
A complete tutorial
Read More

Firefly’s Inpainting is like Dall-e’s Outpainting, but like WAYYYY better.
It’s an easy-to-use image editor powered by AI.
Simply select an area of your image, enter a prompt describing what you’d like to happen, and then sit back and watch the magic happen! You’ll get 4 different options of your completely edited photo in seconds!
Use the menu below to jump through this article to learn everything you need to know about Generative Fill online.
Related Articles:
How to Access Generative Fill Online
Like all other Firefly apps, Generative Fill was just released commercially!
This means that ANYONE can sign up for free and get access to all of the Firefly apps without purchasing any of Adobe’s products.
However, this comes with a caveat. Adobe has implemented a credit system for all its AI applications where everyone gets a credits refill monthly. View the full breakdown to see how many credits you get with your plan.
I will just highlight that the free account only gets 25 credits a month. This means you only would be able to generate or edit 25 things every month.
If you’re interested in testing Firefly out more, after November 1st, you will be able to purchase a Firefly Premium subscription that gives you 1,000 credits monthly.
Alternatively, you get a fair amount of credits from any of Adobe’s other subscriptions. Not to mention, you get access to worldclass design applications with these AI features built in!
Interested in Getting Creative Cloud?
If you’re considering purchasing Photoshop or any other Creative Cloud application, feel free to use this link to do so.
Full disclosure, this is an affiliate link and I’ll get a small kickback for your purchase that I can use to help grow this website.

This will take you to a page where you can upload the image you’d like to edit.

Upload your image and then viola!! You’re ready to get using that AI editing magic!


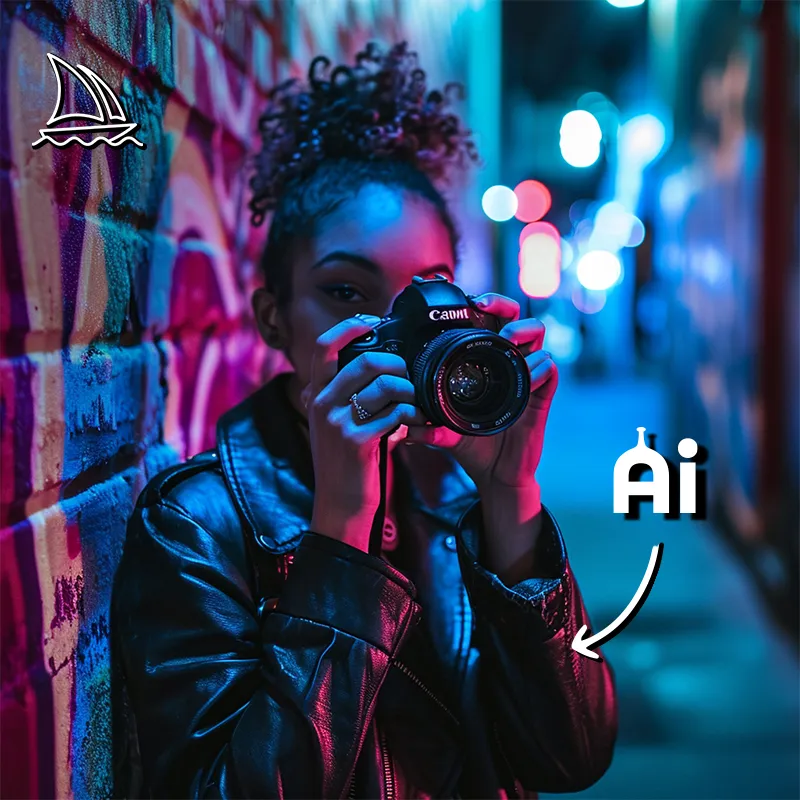
How to Use Generative Fill Online
As you’ll discover in the section below, Generative Fill has a LOT of different tools that will allow you to edit your photo in different ways.
However, you can mostly boil the process down to these simple steps:
- Upload your image
- Select the area of the photo you’d like to change
- Enter a prompt on how you’d like it to change (optional)
- Press Generate
- Select from the 4 generated options
You can repeat and refine any part of this process over and over again until you’ve created what you are looking for.
Make sure you selected more of the photo than you want to edit. Firefly always adds the edit with padding around it.
Also, if you don’t add a prompt, Firefly will just take context from the rest of the photo and try and guess what you’d like filled in.
This works best for removing objects or editing backgrounds. The AI is far less creative or specific without a prompt.
Interested in learning how to use Generative Fill in more detail? Keep reading to the Interface & Controls section where I go into each of the features of Inpainting in detail.
Interface & Controls
Firefly’s Generative Fill has a lot of bells and whistles but some are harder to find than others. Use the menu below to quickly navigate to a short tutorial on all of the Inpainting tools.
Bottom Toolbar
Side Toolbar
Miscellaneous
Bottom Toolbar
The bottom toolbar is the most used area in online Generative Fill. It primarily focuses on tools that allow you to select areas of your image in different ways.

In what I think is an attempt to develop a universal language around their products, Adobe labels your main selector tool a “brush”.
I like to think of the brush as a selector instead. It helps me better understand our first two tools on the toolbar: Add, and Subtract.
You’ll see what I mean below.

Add

Subtract

Brush Controls
Remove Background
Invert Selection
Clear
Add
This is your main selector tool.
When you click and drag this tool accross your image, is adds to your selection.
Anything selected (visualized by appearing to erase part of your image), will be replaced with AI-generated imagery.
Subtract
Opposite to the Add too, Subtract removes from your selection.
For example, see how I’ve selected too much in my image below? My selection cuts into my subject, but I don’t want to change part of my subject.
Using the Subtract tool, I can go over the part of my selection that I don’t want, and deselect it before generating my edits.
Brush Controls
The brush controls section of the bottom toolbar is a dropdown menu full of helpful ways you can alter your brush (or selector as I like to think of it 😏).

Brush Size
This first option is the simplest: it changes the size of your brush.
Who’d of guessed?
Sometimes you want a big brush to select bigger areas of your image, or a smaller brush to carve into those harder-to-reach areas.
Simply click and drag the size slider to adjust the size of the brush to better suit what you are selecting.
Brush Hardness
The Brush Hardness option is the exact same as the Photoshop feature of the same name.
This slider allows you to select the fuzziness of your selector.
A lower hardness feathers the edge of the brush so that your selection has a more gradual (and often natural-looking) edge.
A higher hardness gives your brush a more distinct edge. This setting is really good at selecting around objects with hard edges like a person’s arm or the edge of a mountain.
Brush Opacity
The Brush Opacity tool is, in my opinion, one of the more interesting features Adobe has added.
As the name suggests, this tool changes the opacity of your selector.
Why this is cool is that is controls how much of the original image you’d like to keep within your selection!
Put another way, depending on the opacity, Generative Fill will maintain the image in your selection but will layer the image from your prompt on top.
Lower opacity keeps more of the original photo.
Higher opacity adds more of the prompt.
Midjourney & Firefly Tested Keywords
Monthly Inspo Right in Your Inbox
Sign-up and get style-specific keywords directly to your inbox every month.
Background
This tool automatically selects the background of an image.
Instead of painstakingly brushing over your image pixel by pixel to cut out your subject like the old days, Adobe was kind enough to give us a tool that detects and selects the background for you!
Like most other background removal tools, this feature isn’t perfect. Sometimes the AI struggles to distinguish what is the subject and what is the background.
However, all things considered, I do find the button pretty fast and effective.
You may need to use the Add or Subtract tools to make some minor adjustments to your selection, but that’s still much faster than if you have to do the entire selection yourself!
Invert
Similar to inverting your selection in Photoshop, this button quickly flips your selection to everything you hadn’t selected.
For example, let’s say you would like to edit the subject of your photo, you could press the background button to quickly select the background, and then press invert so it ultimately selects your subject.
Since the background button would select everything but your subject, inverting the selection ensures only your subject is selected.
Clear
The Clear button simply clears your selection. Sometimes you get so deep into a selection, that its easier to reset and start again than it is to try and refine the selection.
Sidebar (Insert, Remove, Pan)
The sidebar is an interesting addition to Adobe’s Generative Fill when compared to Dall-e Outpainting.
Clicking on Insert or Remove switches the intention of the AI.

Insert

Remove
Pan
Insert
This is what Generative Fill is set to by default.
It tells the AI that you intend to select areas of your photo and add new parts.
To Firefly, “adding” doesn’t necessarily mean you’re adding new objects. This mode allows you to add your own prompt and dictate what you’d like the AI to do.
This means you can alter what is already there, replace objects, or yes, insert something completely new.
Similarly to the Generative Fill in Photoshop, you can leave the prompt completely blank and it will use the context of the image to guess what you’d like filled in.
Insert is the most open and creative mode in Genertive Fill, which is why it is set as the default.
Remove
The remove mode does exactly as the name suggests: it removes selected objects from an image.
Unlike Insert, Remove doesn’t allow users to enter prompts as it just uses context from the original image to remove the selected object.
Pan
Unlike Insert and Remove, Pan doesn’t change the intention of the AI. In fact, it doesn’t have anything to do with AI at all!
It is a tool that changes your cursor to the Hand Tool we all know and love.
This tool allows you to click and drag to move your view with your cursor. This is helpful when you are super zoomed in and would like to quickly glance around other parts of the image.
However, in my opinion, clicking this option from the side menu can be cumbersome, especially because holding the spacebar also turns your cursor into the hand tool.
Miscellaneous Tools
Outside of the two main toolbars, Adobe hides some other functions throughout the interface.
I’ve gone through to try and find them so you don’t have to. 🤪
Zoom
If you’re already familiar with Adobe’s shortcuts, you probably already found out how to do this already!
Simply press “control” (command on Mac) and the plus (+) button to zoom in and “control” (command on Mac) and the minus (-) button to zoom out.
If you are working on a laptop you can also pinch in and out on the trackpad to adjust your zoom a bit more precisely.

Download
Even though its a big, bright blue button, it took me a little bit to find the download button when I first started!
For all my other blind people out there who are desperately trying to find this, it’s the blue button in the top right corner of your screen where you expect the profile button to be.
Publish
Publishing your edited image will send it for consideration for the Firefly Gallery. This gallery shows off other Firefly AI Artist’s work in order to teach and inspire others.
This option is a little hidden in the three-dot menu next to the download button in the top right corner of your screen.

Not all images that are submitted are added to the gallery. Team members at Adobe will review your submission before deeming whether or not it can be added to the gallery.
You can everyone’s beautiful work by clicking on “Gallery” on the top menu of the Firefly homepage.

Copy to Clipboard
Copy to Clipboard is a pretty self-explanatory function. It will copy your image to your computer’s clipboard. ¯\(ツ)/¯
It is located in the same three dot menu the Publish button is hidden under.
How to Save
Unfortunately, like Firefly’s Text-to-Image generator, Adobe doesn’t automatically save your image history.
Even worse, the Favourites function does not work in the Generative Fill app.
If you want an image DOWNLOAD IT!!!
You will NOT be able to recover it after the fact.
Adobe has long talked about this being a priority for the next set of AI features but until its fixed, download everything you make!
Prompting Tips & Tricks
I have the same prompting tips for online Generative Fill that I’ve had with all other Firefly products. I go into all of these in much greater detail in our Firefly Prompt Guide, but here’s a quick summary specific to Generative Fill:
- Don’t use Artist Names
- While using “In the Style of [Insert Artist Name]” is an effective technique in other large generative AIs like Midjourney and Dall-e, it does not work in Firefly. Since Firefly was trained on Adobe Stock, it doesn’t actually know any artist names or branded keywords (like Nike or Gucci).
- Use Adobe Stock for Keyword Inspiration
- Firefly was trained on Adobe Stock, so there’s no better way to get inspiration than browsing the source. You no longer have to guess what the AI knows because you are essentially getting inspiration from its training data.
- Use the Firefly Sidebar for Keyword Inspiration
- Similar to using Adobe Stock for inspiration, using keywords from the Image Generator’s sidebar guarantees the AI knows what you are talking about.
- Browse the Firefly Gallery
- Get inspired by what other talented artists have done with Firefly’s gallery. You can even click the image and try the prompt yourself so you can get a better understanding of what works in Firefly.
Prompt Inspiration!
Monthly style guides with hundreds of prompts.

Ukiyo-e Prompts

Pop Art Prompts

Fantasy Art Prompts
How to Extend an Image with Generative Fill Online?
Put simply, you can’t.
Firefly’s Inpainting does not currently support the ability to add anything outside of the bounds of the original image.
The great news is that Generative Fill in Photoshop DOES support extending a photo. Check out this article to learn how to extend photos with AI in seconds.
The only downfall of this approach is that you will need to have purchased an Adobe License to use this new technology.
These licenses can be pricy and not available in everyone’s budget. Great news is that you can use Dall-e to extend your photo. Dall-e offers its users a couple of free credits every month, so you can extend a couple of images every month for free. After that, you can buy 115 credits for $15 USD which is drastically cheaper than buying Photoshop.